Email groups should not be visible on the front end. Please deselect the "Show It" box in the group editor to maintain a clean, understandable Browse/Shop menu.
BEST PRACTICE: Only 1 email address per email group. Items that need to send per-payment alerts must be assigned each email group. Search for the email in Portal > Inventory > Groups (group name column) before creating new as the email group for that contact may already be created.
An email group is hidden and created solely to contain a staff email address that will receive order alerts. Every item assigned to the email group will dispatch an order alert to that staff, per purchase.
- Go to Inventory > Groups.
- Use the search fields under Email #1/Email #2 to see if the email is already listed.
If there is a match, and the group is hidden/designated for order alerts only, but differs from this article's instruction, update for consistency.
If there is a match, but the group is public-facing (intended for customer distribution), follow the cleanup steps outlined in Check If the Public Group Has Order Alerts.
If there is no match, proceed.
- Click + NEW GROUP.
- Next to Group Name, enter "[email] " (space after closing bracket) and enter the email address.
Using prefix "[email] " helps identify the group's purpose. Placing the email address in Group Name helps find and assign the email group to the item. Consistent naming helps avoid duplicate entries.
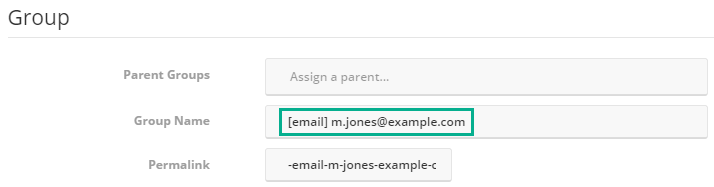
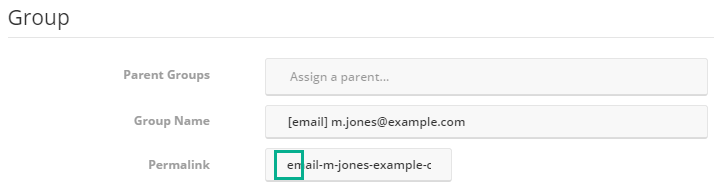
- Next to Permalink, delete the leading dash.
- Next to Show It, deselect the checkbox. Email groups should always be hidden.
- Next to Order Alert, select the checkbox. This field must be marked to enable the feature.
- Next to Email #1, enter the email address. This field must contain the email address.
- Click UPDATE.
- Repeat all steps for each email address (1 email per email group for flexible use).