The article, "Invoice for a Daily Contract," is available for download below.
For assistance, contact RegWerks Support at 888-847-9470 or Support@RegWerks.ZenDesk.com.
If this is your first time invoicing, feel free to contact RegWerks for assistance with the invoicing process.
1. Before beginning the invoicing process, ensure that Pre-Pay is turned on within the class’ Contract; doing so allows you to set Due Dates when billing.
2. Select Class under the Main menu, and then double-click into the class for which invoices need to be generated.
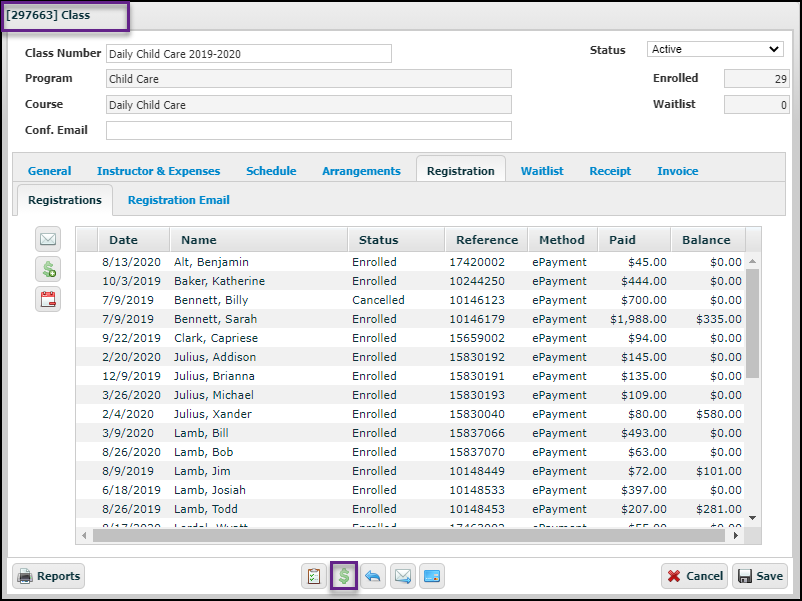
- Verify that all necessary adjustments have been completed and suspensions have been made.
3. Click the Calculate Charges button ( ) at the bottom of the window, and the Calculate Charges window will open.
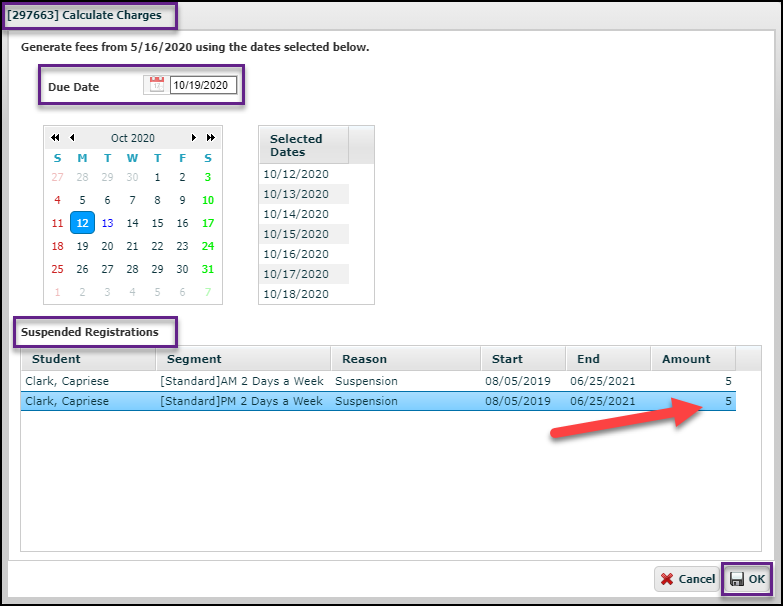
4. The Start Date will auto-fill. Define the invoicing time frame by holding the Ctrl key (Windows) or the Command key (Mac) and by then clicking on each day which is included in this billing cycle.
- NOTE: If billing on a weekly cycle, it is recommended that the invoicing time frame ends on the Sunday of the week in which fees are being billed.
- Once all days are selected in the calendar, enter in the invoice Due Date to select the day on which payments will be due.
5. If there are no suspended registrations listed in the Suspended Registrations section, proceed to the next step.
- If there are suspensions with partial amounts due for the invoice period, please note that the system will not automatically calculate these partial charges. Partial amounts due must be manually entered in the Amount column, as noted above by the red arrow.
6. After verifying that the Selected Days and Due Date are correct, click OK. A Charges Report will open as an Excel file for final review. This report displays only calculated charges. It does not include unpaid previous balances. Save this report for future reference, if desired; otherwise, close out of the Excel file once a final review of charges is complete.
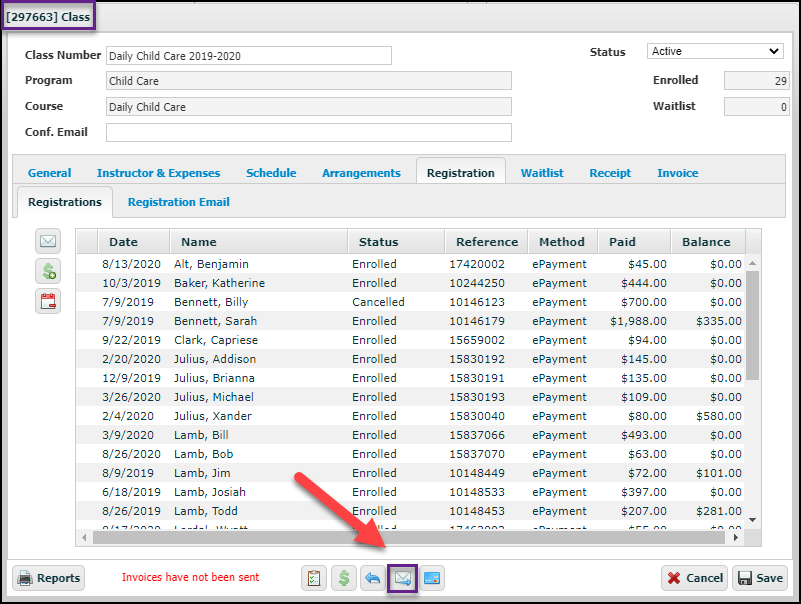
7. Back in the RegWerks system, the Class window will still be open. Click the Send Invoices button at the bottom of the Class window.
- Select Preview, when prompted to answer the question, “Do you want to preview the invoices or send them?” Invoices may be reviewed or printed at this point. Close the browser tab when finished.
8. When the Invoices window opens, click Preview to review or print the invoices, which will open a new tab in your browser and allow you to verify that the invoices look correct.
- If the invoices appear to be incorrect:
-
- Close out of the browser’s Preview tab and undo the invoices using the Undo Charges button. Select Yes when prompted, “Are you sure you want to undo the fee generation?”

-
- Save out of the class after undoing the charges, then double-click back into it.
- Make all necessary adjustments to correct errors on the invoices.
- After making all required changes, redo the steps above starting at Step 2.
- If the invoices look correct:
-
- Close out of the browser’s Preview tab.
- Click the Send Invoices button, then select Send. Once Send is selected, a processing window will pop up for a moment; when it disappears, Save out of the Class.
9. Invoicing is now complete.